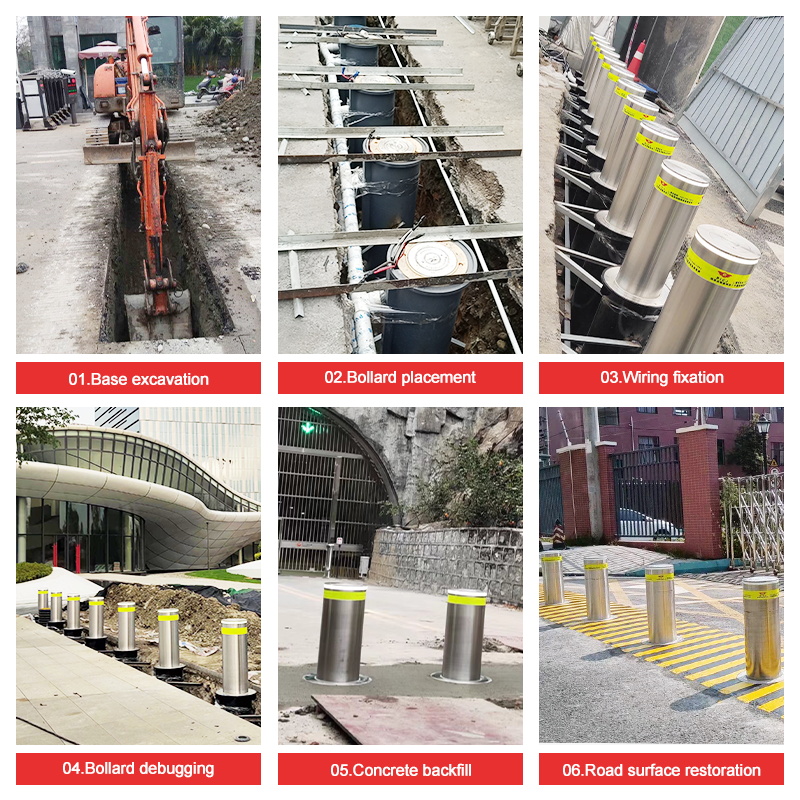
Installing traffic bollards involves a systematic process to ensure proper functionality and durability. Here are the steps typically followed:
-
Excavation of Foundation: The first step is to excavate the designated area where the bollards will be installed. This involves digging a hole or trench to accommodate the bollard’s foundation.
-
Positioning of Equipment: Once the foundation is prepared, the bollard equipment is positioned into place within the excavated area. Care is taken to align it correctly according to the installation plan.
-
Wiring and Securing: The next step involves wiring the bollard system and securely fastening it in place. This ensures stability and proper electrical connection for functionality.
-
Equipment Testing: After installation and wiring, the bollard system undergoes thorough testing and debugging to ensure all components are working correctly. This includes testing movements, sensors (if applicable), and integration with control systems.
-
Backfilling with Concrete: Once testing is complete and the system is confirmed to be operational, the excavated area around the bollard’s foundation is backfilled with concrete. This reinforces the foundation and stabilizes the bollard.
-
Surface Restoration: Finally, the surface area where excavation took place is restored. This involves filling in any gaps or trenches with suitable materials to restore the road or pavement to its original condition.
By following these installation steps meticulously, traffic bollards are effectively installed to enhance safety and traffic management in urban environments. For specific installation requirements or customized solutions, consulting with installation experts is recommended.
Post time: Jul-29-2024


